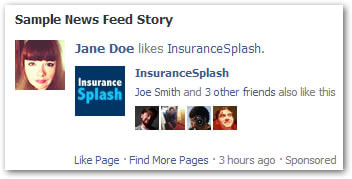
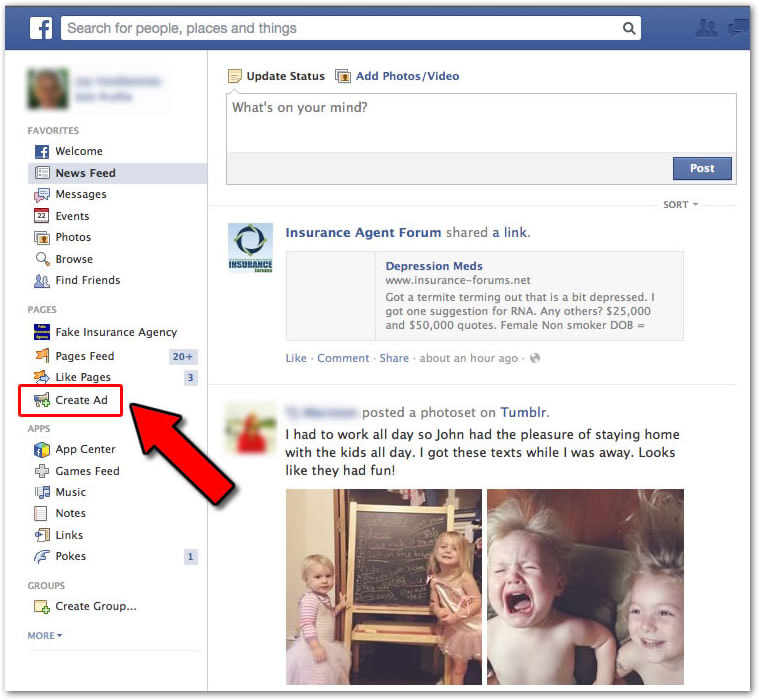
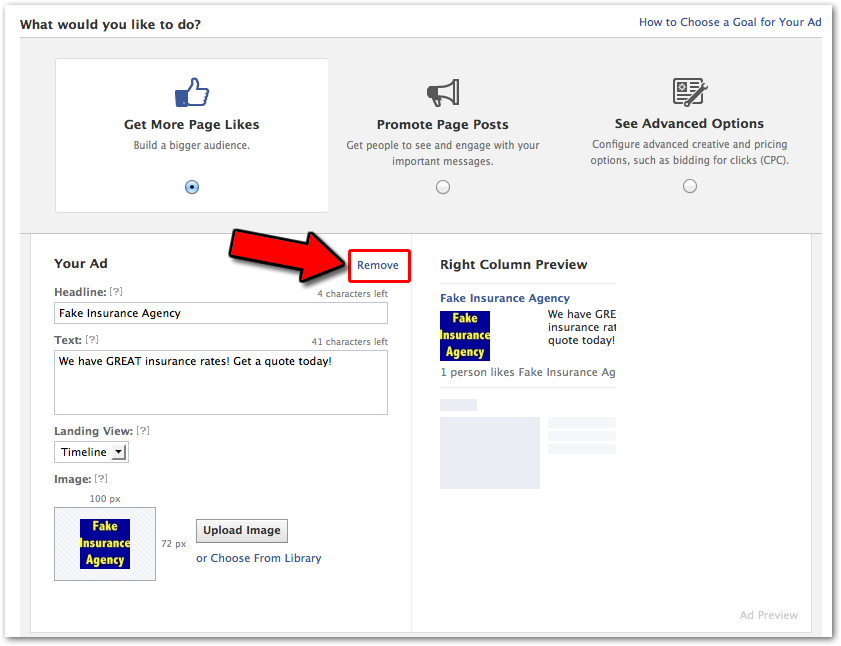
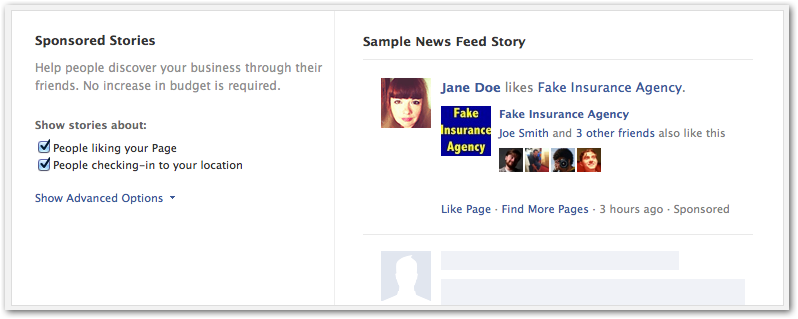
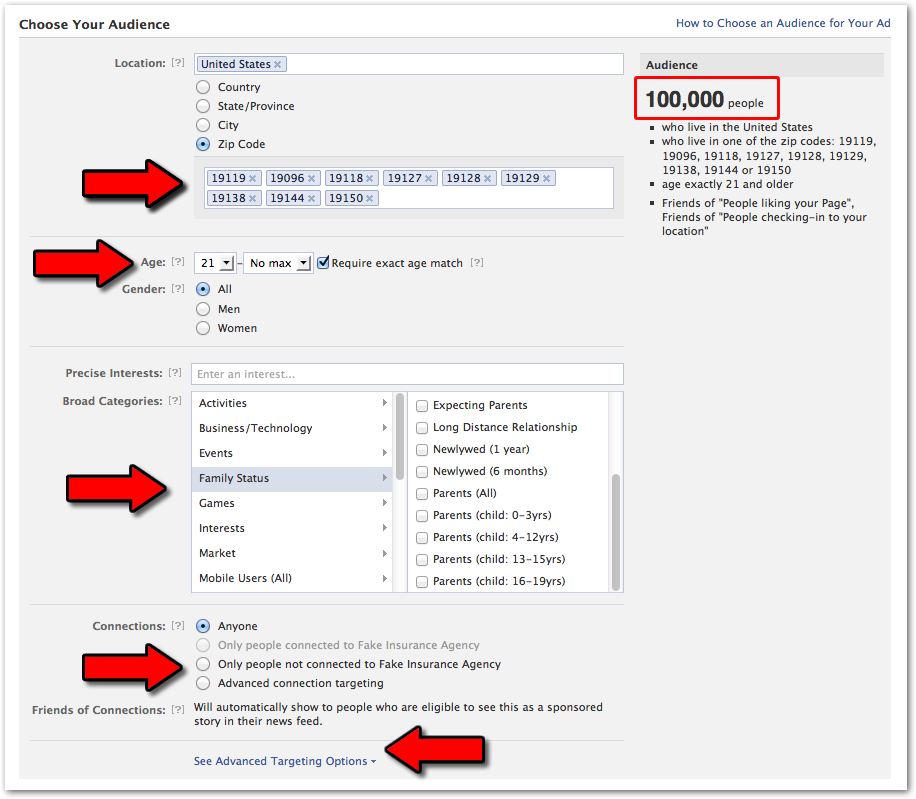
 Thinking about trying Facebook ads? You’re in the right place. Facebook has many ad types and there are countless strategies, ideas, and tips you could implement but that’s not what this article is about. This is a quick tutorial for setting up the easiest, quickest, and one of the the most successful Facebook ads an insurance agency could run in under 10 minutes. You don’t have to worry about writing any fancy headlines or clever ad copy and it displays within the news feed (as opposed to the right column) so people are much more likely to see it. It’s called a Sponsored Story, and it looks like this: An ad like this shows to friends of people who already like your agency’s FB page and it encourages them to follow it too. Since people see their friend already likes your agency, there’s instant social proof. It’s not going to get you 100 new Facebook fans this week or make the phone ring like crazy, but you could certainly catch someone currently shopping for insurance and if they see an endorsement from their friend it could generate a call. If nothing else, it should generate more likes for your page and we can set it up in 10 minutes. Give it a shot. I’ve made it super easy with steps below and you can set your own budget. Spend a dollar or two a day for the next week and see what happens. Here’s the steps for setting up a Sponsored Story Facebook Ad for your insurance agency: Step 1 – Log into FacebookUse an account with administrative rights over your insurance agency’s Facebook page. Step 2 – Click the Create Ad LinkFrom the main Facebook screen, click the link on the left margin that says, “Create Ad”. (Things on Facebook are always changing so you might just need to find another link that says, “Create an Ad” somewhere else) Step 3 – Choose Your Agency’s Facebook page.Step 4 – Remove Facebook’s Suggested Ad TypeClick the Remove link to get rid of Facebook’s suggestion that you create a custom written ad for the right column. (You could make one of these if you want but they have low conversion levels since nobody looks at the right column ads anymore.) Step 5 – Activate the Sponsored Stories AdsClick the checkmarks for “People liking your page” and “People checking-in to your location”. (If you don’t have the “check-in” option it’s probably because you didn’t setup your FB page as a local business. You can change that later) Step 6: Decide Who’s Going to See the AdThe Audience Number in the top right corner will adjust as you limit the potential people who could see this ad. Although I’m usually a big proponent of targeted advertising, for this particular type of ad it’s not too important so try to keep your audience number as high as possible without showing ads to people who can’t buy from you. Here’s a few of the most important points:
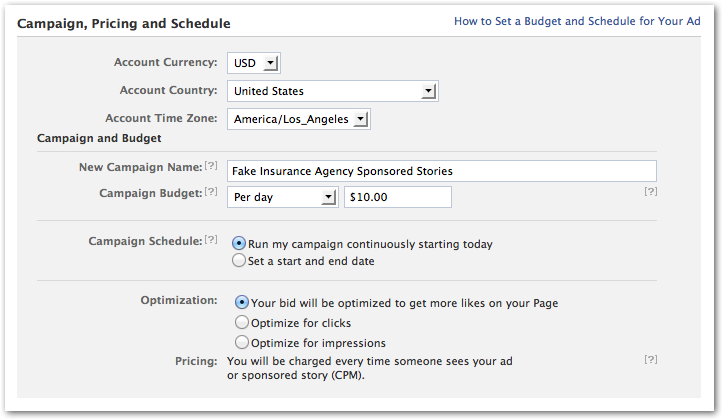
Step 7: Establish your BudgetThis is pretty self explanatory. Even just a couple bucks a day can get you started and you can always raise or lower your daily budget so I wouldn’t recommend going overboard here. Step 8 – Finish and pay.At the end you’ll click “Review Ad” which should show you all the settings you established. If you approve everything then click “Place Order” and enter your credit card information. I didn’t include pictures because I’m pretty sure you’ll be able to get through the rest on your own. That’s pretty much it! Would you do me a favor?If you follow these steps to setup your first Facebook ad (or plan to) would you click the “Like” button so I know you like tutorials like this?
and If you have success (or failure) with your first Facebook Ad experience please let me know about it in the comments below. Thanks! John
0 Comments
Leave a Reply. |
InsuranceSplashThe #1 Insurance Marketing Website for Agents. Free insurance marketing ideas, tools, strategies, and training to help agents succeed. Archives
June 2023
Categories
All
|


 RSS Feed
